Baja Mexico Adventure Ride
9 days from Tecate to the tip of Baja at Cabo San Lucas, and back
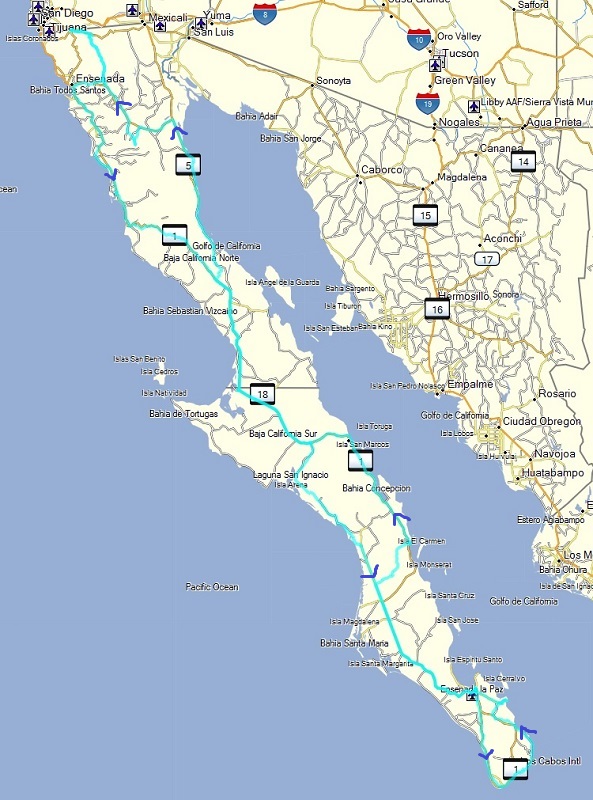
 This adventure motorcycle ride covered the entire length of Baja Mexico.
Starting at the US border at Tecate, it works its way south through a mix of
asphalt and dirt, all the way to the tip at Cabo San Lucas. Following
more of the Pacific side on the way down, we then return back north mostly
on the Sea of Cortez side to the east, but with some zig-zagging further inland for some
more interesting locations along the way. The terrain for this ride ended up being
quite varied, with many opportunities to pick your level of difficulty based
on your skills and interests.
I did this ride as part of larger group of 23 other adventure motorcyclists as organized by “GPS Kevin”. It was a diverse group of riders originating from all across the US, spanning from Mexico to Maryland. Many have done previous rides by GPS Kevin, including myself also doing the Continental Divide Ride the previous summer. For this ride, I knew about a quarter of the group from last time. Given there were a few last minute cancellations, Kevin back-filled the roster with his younger son and daughter (Missy). Missy was there for the entire trip on a CB500X, while his son had to head back after the first day to help get another rider and his bike back over the border after an injury (to be covered on the next page).
Kevin organizes his routes with a relative difficulty using a color of either green, blue, or red. I tried to do more of the blue routes that is a better match for my skill levels and bigger bike size. Like before, during the ride we broke into smaller groups, and typically of similar riding skills, ranging from 3 to 6 in order to keep things more efficient, and to also maintain a support network in case of difficulties along the way. Riding in small teams allowed everyone to make it the destination for each day’s end point, albeit sometimes a bit more worse for wear.
For overnight accommodations, we stayed in a diverse range of hotels, sharing a room each night with one other rider. Most of these accomodations ended up being quite nice. One big advantage of the GPS Kevin rides, is that a support truck will travel to the hotel for each day’s destination, carrying one duffel bag with your overnight gear, thus reducing what you need to carry on the bike each day of the ride. However if you are broken down or otherwise find yourself in trouble, don’t expect the truck to come to your rescue, as that is primarily between you and your immediate team, while the truck may not necessarily be able reach your location or be within cell phone coverage depending on where you are. There are other organized more expensive rides that are more structured and full service if this barebones and more hands-off approach is not for you.
 Given
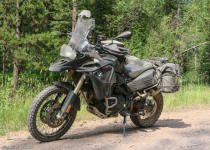
the distances for this planned ride, I again took my 2015 BMW F800GS Adventure
bike, with its additional crash protection. With
this extra armor and accessories, the bike weighs 530 pounds wet with a
6.3 gallon tank. Consistent with the CDR experience, to keep the bike a bit lighter and better handle the
inevitable off-road crashes, I decided to forego my fancy BMW aluminum
panniers, using Wolfman soft saddlebags instead. Consulting some other
riders, a few were wary of bringing a bigger bike due to more sand expected
for this ride. I decided to make the trade-off and minimize any routes
reported to have longer stretches of deep sand, and to try to be a bit more
conservative in my riding style, given help south of the border may be more
questionable. More on that later...
 After my so-so experience with Heidenau K60
tires from the CDR ride and its relatively long break-in buzz, I decided toss what was left of these and start
with a fresh set of Mitas E-07 (non Dakar version). As to be reported
later, I was happy with this choice, with the E-07's providing more confidence in
the loose terrain with its slightly bigger knobs, while still feeling confident on the
asphalt twisties, and
still having
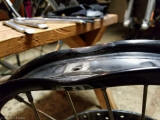
a reasonable wear life. In addition, given the number of severe dents
to the front rim from the CDR ride, I replaced the stock rim for a heavier
duty Excel rim built by Woody's Wheels using my stock hub, while also
installing some Hyperpro progressive springs in the front forks. Given my
paranoia about this, I was also more careful how much air to let out even
during the sandier terrain. This ended up being a wise choice, given some
rocky terrain, a surprising number of potholes on the Mexican roads, and the
experience of some other riders...
For navigation, each rider had at least one GPS mounted on their bike, with a map (and tracks) provided by GPS Kevin. For the Baja ride I upgraded to a Garmin Zumo 395LM, and have not looked back. The user interface takes a bit getting used to, and the "motorcycle riding" mode should be avoided due to its funny routing algorithms, but after those learnings it ended up being quite useable, readable during daylight, and dependable.
To capture still images and video for this ride,
I brought along a Canon G7X higher end point-and-shoot camera. It has
a 1" sensor, a reasonably good quality lens with a focal range of 24-100mm
and aperture of f/1.8, while small enough to keep in my tank bag for quick
access.
 I did not miss the lack of a viewfinder given some of the time I was
photographing with my helmet on.
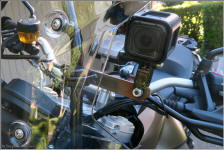
Most of my video was shot with a GoPro Hero Session that I mounted with a custom bracket to the left side of my windscreen. This location is stable with a minimum of vibration, while convenient to access for quickly turning off or on with a one button press, and a blinking red LED on both sides to let me know when it is running. From this location I can also flip it around to point toward me for a selfie mode. The Hero session can capture about 1 - 1.5 hours of video on one battery charge (1080P at 30 fps), which typically was good enough for about 2-3 days of riding.
For this blog, I will document each day on a different page, showing the map and some photos in chronological order for the day’s ride, and the experiences encountered along the way. So if you are considering exploring Baja yourself, or just want to learn more about what this ride is like, then read on.
At the conclusion page, GPS tracks and a video of the ride can also be found, along with a post-mortem of the bike.
Intro Day 1 Day 2 Day 3 Day 4 Day 5 Day 6 Day 7 Day 8 Day 9 Conclusion
All content and images are property of Stephen Fischer Photography, copyright 2018. Last updated: 5/3/2018